NordVPN - Register/Install/Usage
Today Keys : NordVPN, VPN, install, setup, register,usage,how to use,china, cloud, test,cdn
In this post, we will learn how to install and use Nord VPN. If you use a VPN program, you can access the site you want by using a domestic or overseas VPN server as a detour. In other words, by using a VPN, you can make it as if you are connecting from any country other than Korea, such as the US or Europe. Therefore, content that is only available in a specific country can be viewed the same in Korea.
First, access the Word VPN website to use 'Nord VPN'.
>> Connecting to the Nord VPN site (Direct Link)
First, access the site using the link above to sign up for Nord VPN.
When you access the Node VPN site, the following initial screen appears, click the red button at the bottom to sign up.

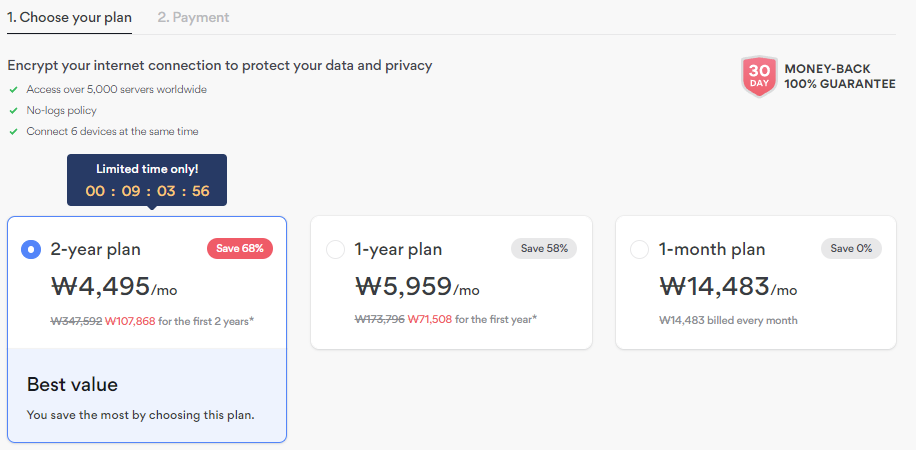
First, decide on your pricing policy (plan). The longer the subscription period, the greater the discount rate, so it is recommended to take a longer period if you plan to use it continuously. 100% refund is possible for 30 days, so there is no need to use a monthly plan instead of a long-term subscription. If you sign up for a long-erm, and if you don't like it, you can get a refund within 30 days.

Here you can choose options for security and privacy, you don't have to 'add' them.
Click the 'Continue Payment' button to proceed to entering payment information.

In Payment Information, enter the email address you want to use for your account. The email address is also used for the account, but also to receive emails to set the initial account password.
Payment methods are also possible with credit cards and cryptocurrencies such as Kakao Pay, overseas credit cards, PayPal, and Bitcoin.
Payment is made with a domestic card only.

When you're done paying for it, you'll receive a welcome mail and an email to activate your account with the mail account you entered at the time of subscription.

If you open the mail account activation,
There is a link to set your password and activate your account as follows:

Set the initial password.

Once you have set up your password, you can download the installer.
If the installer does not download automatically, you can select 'try again' to receive the program manually.

When you run the installer, you can choose which directory to install:
Click the Install button at the bottom because it will be installed in the default directory.

After the installation is complete, the login screen appears as follows:
Log in by entering your initial subscription email account and the password you initially set.

Once you've logged in, the map will appear and you'll find the 'quick connection' button at the bottom.
You can be press the quick connect button to connect to the VPN.

Let's check your current IP information before accessing the VPN.
You can check your current IP address at https://www.whatismyip.com

Now try connecting VPN.
When you click Initial Quick Connect, it connects to a VPN server near your current country.

If you check back at whatismyip.com again, you can see that the IP has been changed to VPN.

When you move the map and click on the desired country, the VPN connection changes as follows:

When the connection is complete, the IP address to be bypassed by the VPN is displayed with the completion message.

If you check whatismyip.com you can see that it has been changed to the IP of a country with VPN access.
